I wanted to make some cards with these poinsettias from The Greetery that did not necessarily need to be used for Christmas. I kept the sentiments to just "warm wishes" and "just for you". I also wanted to try out the poinsettia envelope stencil to pair with these cards. I couldn't decide which colour I liked best - aged mahogany or festive berries!

Paper - Stampers Select White (PTI); Toffee (TE)
Ink - Olive, New England Ivy, Tulip, Old Barn, Honey, Goldrush, White Daisy (CTMH);
Aged Mahogany, Festive Berries distress oxide (Tim Holtz)
Stamps - With Love at Christmas (The Greetery)
Stencils - Flappable (The Greetery)
Here is my first set of cards that I made using the beautiful poinsettia arrangement from The Greetery. I used a bunch of coordinating Close To My Heart colours to achieve this beautiful layered look. I couldn't help but try out this colour combination used by the talented Heather Nichols during the release on the lovely toffee cardstock from Taylored Expressions.

Paper - Toffee (Taylored Expressions)
Stamps - With Love at Christmas (The Greetery)
Ink - Olive, New England Ivy, Tulip, Old Barn, Honey, Goldrush, White Daisy, Archival Black (CTMH)

Christmas Card Count: 74 + 8 = 82
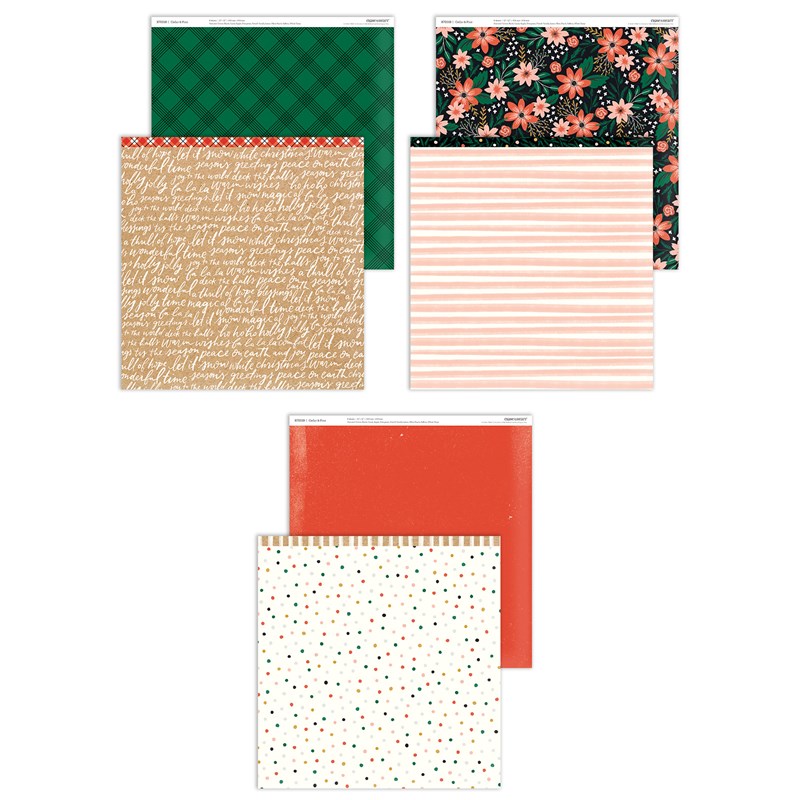
Can you tell how much I am loving this paper collection yet?! I decided to make up some simple Christmas cards to add to my stash with this gorgeous paper and a stamp set from the Close To My Heart holiday catalogue. I am linking up with the "anything goes" challenge over at Heart2Heart.

Paper - Cedar & Pine, Watercolour Paper, Candy Apple, Evergreen (CTMH)
Ink - Archival Black (CTMH)
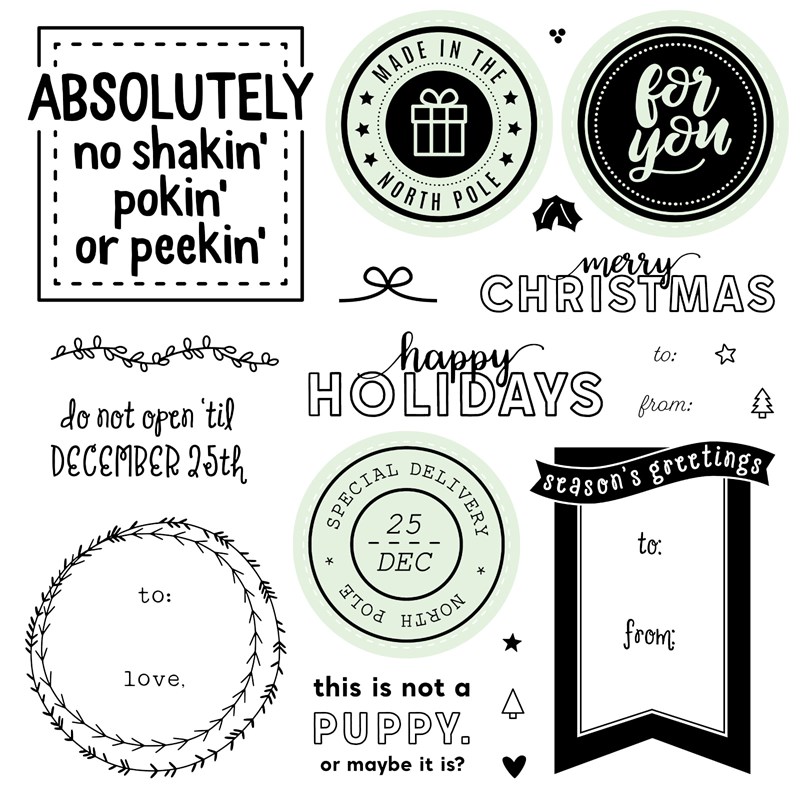
Stamps - No Peekin' (CTMH)

Christmas Card Count: 64 + 10 = 74


It's my baby's 2nd birthday today! I wanted to make him a special birthday card so I pulled out some of my Lawn Fawn favourites. My goal was to create a scene similar to our yard. Harvey gets very excited these days watching the deer in our yard. We have some beautiful poplar trees all over our yard amidst a mountain view so I tried to recreate that with these Lawn Fawn die cuts. I'm pretty happy with how this card turned out :).

 Paper - Stampers Select White (PTI); Charcoal, Cocoa, Watercolour paper (CTMH); 
Perfectly Plaid Chill, Frankenstein Line Dance (LF)
Ink - Archival Black, Cranberry (CTMH)
Stamps - Happy Village, Cheery Christmas (LF); Alphabet (CTMH)
Dies - Happy Village, Cheery Christmas, Happy Birthday Line Border, 
Stitched Hillside Border, Stitched Mountain Borders, Birch Trees (LF)
Markers - 761, 969, 977, 992 (Tombow)


Here is the birthday invitation I designed this year for my son's 2nd birthday. I really wanted this picture to take place outside but the light that day really threw off these colours and editing does not seem to help! Oh well, I still love how the invitation turned out :). I have learned that it is much more practical for me to enjoy making one elaborate invitation and take a picture to send out to everyone to invite.

Paper - Charcoal, Watercolour paper, White Daisy, Gold glitter paper (CTMH);
Frankenstein Line Dance, Jack O'Lantern Line Dance, Perfectly Plaid Chill (LF)
Stamps - Jump For Joy, Cheery Christmas (LF)
Ink - Archival Black, Olive (CTMH)
Dies - Jump For Joy, Cheery Christmas, Stitched Mountain Borders (LF); Wonky Stitched Squares (MFT)

Halloween does not have to be an event riddled with tons of waste. Here are a few ways that you can go green this Halloween.

Costumes

Halloween costumes can be expensive and wasteful given their quality and nature of typically being single-use. There are ways to be greener about Halloween costumes that is better both for the environment and for your wallet! One idea is to create a costume for your child out of items they already own. With a few simple additions and a little creativity there are many ideas that can have a great effect! 


My goal with a Halloween costume is to create something using clothing and items we already have around the house and integrate some handmade items that can be played with again later. Last year I set out to create a Batman costume. Using a grey ROWE Kids zomper that we already owned, I paired it with a black Funky Fluff cloth diaper that we use in our cloth diaper stash. My Mom and I made the cape so that it could be enjoyed for years to come. We designed our own pattern and sewed the cape using black broadcloth fabric and black adjustable snaps at the neck from FabricLand. I got some black and yellow felt from the Dollar Store, cut out the pieces in the Batman design and sewed it together. I then sewed it onto the cape. We used the neutral Nooks Design baby booties that we already owned for footwear. Harvey was warm, comfortable, and cute in his Batman costume and we had a great time taking him around to family and friends. This Halloween costume cost approximately $5.75!


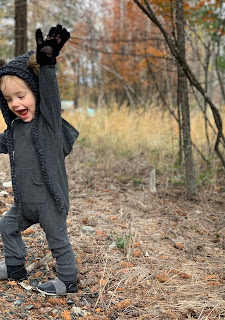
This year I created a bear costume from a ROWE Kids zomper that we were gifted and a beautiful handmade toque from Wild Child Designs that we already owned. If you are wondering if there is such a thing as a grey bear - there is! The Glacier Bear is a subspecies of the American Black Bear with silver-blue or grey hair found in and around Alaska. The toque we had came with two poms to give it a bear look. Next, I got some black gloves and some brown felt and hand stitched the brown felt onto the gloves to make it look like the pads of a bear paw. We used the black Nooks Design wool booties that we already owned to finish off the outfit and ensure my little guy’s feet would stay toasty warm all night! I love using a ROWE Kids zomper for a Halloween costume because it is something we already own, the onesie aspect keeps my son warm, and it is super easy for quick diaper changes with the ankle to ankle zipper when we are out and about. This Halloween costume cost approximately $2.50!

I am excited to be featured on the ROAM by ROWE Kids Blog with these Halloween costumes!

Candy

Candy can be one of the most wasteful components of Halloween with all of the tiny wrappers that are often non-recyclable. Consider buying candy in bulk at places like Bulk Barn if you are giving to family and friends. Here, you can bring in your own reusable containers. Another option could be bringing your own containers to your local chocolate shoppe to save on the packaging. For younger children, you could even skip the candy altogether and go for a Halloween themed book. Below are a couple of options through affiliate Amazon links.


Trick-or-Treat Bags + Baskets

There are many options for bags or baskets to collect candy that can be reused or repurposed. The Halloween basket that my son is using this year happens to be a third generation hand-me down! It was originally given to my Mom when she was a child, I used it for several years growing up, and now my son can enjoy it! The handle did break this year but I was able to mend it back together.


Some stores, like Save On Foods, are even offering reusable Halloween bags with grocery purchases this month. These can be used for trick-or-treating and then as grocery bags during the rest of the year. Other options include using a pillowcase or making your own fabric bag.

Check out this amazing paper collection now available at Close To My Heart - Cedar & Pine! When I was prepping for another project and cutting this paper I happened to set it on top of a pile of kraft. It looked really lovely together so I decided to make another project with this pairing! I started out with Freshly Made Sketches. I added in some pine boughs behind the 'Merry' sentiment. I haven't decided which embellishments I like best or if I need any at all! I used both kraft and paper bag backgrounds. There is a slight difference to these Lawn Fawn cardstocks and I like them both :).

Paper - Cedar & Pine paper collection; Candy Apple cardstock (CTMH); Kraft, Paper Bag (LF)
Dies - Merry Poinsettia (Studio Katia); Flourished Tag (Verve) 
Embellishments - Gold sequins, Chelsea enamel dots (CTMH)


Christmas Card Count: 52 + 12 = 64


Taking a look at my paper stash I came across these old beautiful Close To My Heart papers that looked stunning with some gold embossing. I kept the cards fairly simple to show off the lovely designs. I finally got to try out the new envelope stencils from The Greetery and love how they pair well with gold embossing and these cards. I am linking up with the 'sparkle' challenge over at Heart2Heart.

Paper - Vanilla Malt (Lawn Fawn); Gold glitter paper, White Pines, Pear & Partridge (CTMH)
Stamps - Merriest Christmas (CTMH)
Embossing Powder - Princess Gold (Ranger)
Stencils - Flappable Stencil (The Greetery)
Dies - Basic Circles (CTMH)

Christmas Card Count: 46 + 6 = 52
I have been posting on instagram regularly but have not updated my blog with a few of my latest cards! I liked the layout I used for some Christmas cards I made earlier so I paired it with some older papers in my stash. I coloured the sentiments in green this time and added some sparkly snowflakes :).

Paper - White Daisy, White & Silver glitter paper, City Sidewalks paper collection (CTMH)
Distress Watercolor Paper (Tim Holtz)
Ink - Archival Black (CTMH)
Marker - 177 (Tombow)
Dies - Stitched Alpine Snowflakes (Poppy); Stitched Rectangle Frames (CTMH)

Christmas Card Count: 34 + 12 = 46
I was able to put together a few of these sympathy cards to have on hand. I was inspired by all of the bone folding accents that Laurie Willison has been using with some of her cards using the amazing products from The Greetery, so I decided to give it a try myself! I just love these cotton sprigs that I picked up from MJ's Florals in town to match with this beautiful set.

Paper - Stampers Select White (PTI)
Stamps - Cotton Comforts (The Greetery)
Ink - Whisper (CTMH); Gathered Twigs, Walnut Stain distress oxide (Tim Holtz)

© Allie's Adventures in the Kitchen, Crafting, and the Kootenays! · THEME BY WATDESIGNEXPRESS