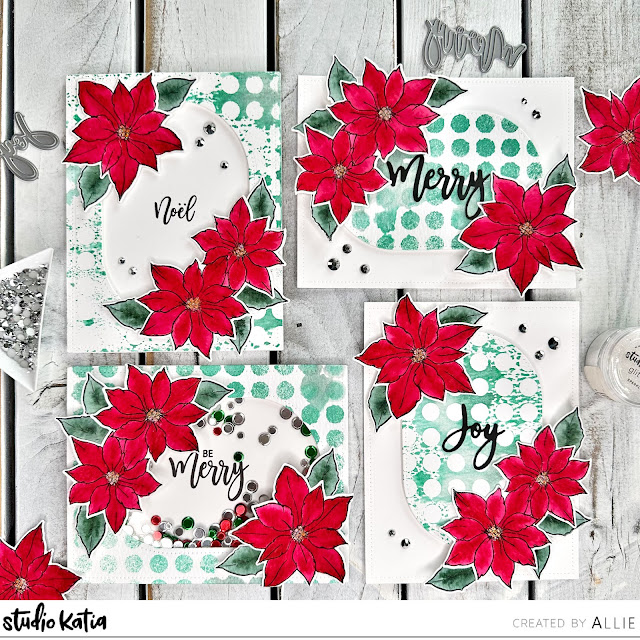
Good morning! I am up on the Studio Katia Blog this morning getting a jump start on my Christmas card stash. With all of the Christmas in July inspiration out this month, I decided to take out one of my favourite Studio Katia Christmas sets: Merry Poinsettia. I tried out the following technique so that I could make four coordinating cards all at once.
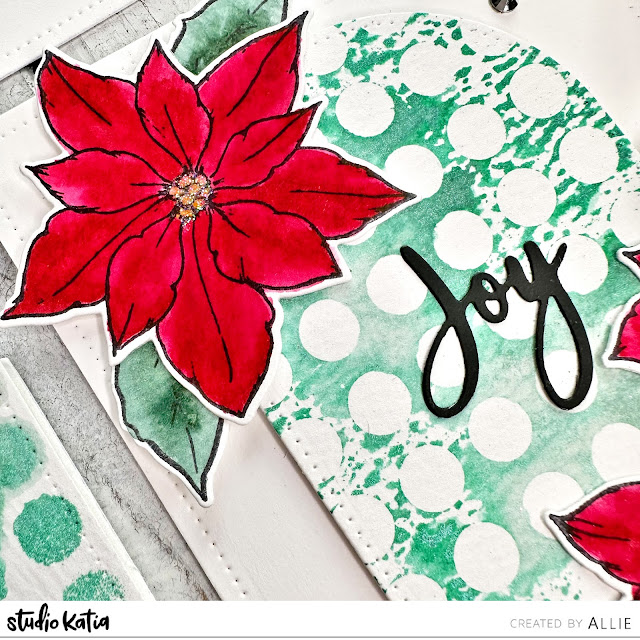
First, I cut out two rectangles in watercolour cardstock using the Darling Ribbon & Frames. I laid out the Large Polka Stencil on top of one rectangle and sprayed it with Distress Mica Stain - Merry Mint + Distress Spray Stain - Lost Shadow. Then, I took the other rectangle and pressed it on top of the wet stencil to create a negative design. Once dry, I die cut an oval out of the centre of each piece of watercolour cardstock using Dotted Patterns - Set 3.
I stamped out four poinsettias, four double poinsettias, and 24 leaves onto watercolour cardstock using the Merry Poinsettia stamp set. I coloured the poinsettias with Tombow 847 + 933 (for the centres) and the leaves with Tombow 249 and a wet paintbrush. Once dry, I added some sparkle glitter to the centres with some liquid glue. Next, I die cut all of the pieces using the Merry Poinsettia coordinating dies.
I mounted the ovals onto some white cardstock cut out in the Darling Ribbon & Frames rectangle using double sided foam tape 1/16" thick. I die cut 'Merry' and 'Joy' in black cardstock using the Merry Poinsettia coordinating dies and adhered them to the ovals using liquid glue. I adhered one single poinsettia with two leaves, as well as the double poinsettia with four leaves around the oval. To add a bit of bling, I added in some Silver Crystals using my embellishment wand + liquid glue.
I used two more pieces of cardstock die cut with the Darling Ribbon & Frames. On these, I stamped a sentiment from the Merry Poinsettia stamp set in black ink. I used the double sided foam strips 1//16" thick to mount the frames onto the cardstock and added some poinsettias around the edges as I did to the other cards above.
As I was putting together the last card, I thought I could also easily turn it into a shaker card! I added some acetate to the back of the frame I created, adhered some double sided foam tape and then poured in some Silver Foil Confetti + Classic Christmas Confetti (I removed the gold pieces). Four cards to start off my Christmas card stash - yay!
You can find a video tutorial on the Studio Katia YouTube channel and a reel on Instagram!
Thanks for stopping by!
Christmas Card Count: 4
Supplies
Paper: Solar White (Neenah); Distress watercolour paper (Tim Holtz); Black Licorice (Lawn Fawn)
Ink: Archival Black, Black (CTMH)
Markers: 249, 847, 933 (Tombow)
Stamps: Merry Poinsettia (Studio Katia)
Dies: Darling Ribbon & Frames, Dotted Patterns - Set 3, Merry Poinsettia (Studio Katia)
Stencil: Large Polka (Studio Katia)
Sprays: Distress Mica Stain - Merry Mint, Distress Spray Stain - Lost Shadow (Tim Holtz)
Embellishments: Classic Christmas Confetti, Silver Crystals, Silver Foil Confetti (Studio Katia)
Other: Acetate sheets, Double Sided Foam Strips 1/16" thick, Double Sided Foam Tape 1/16" thick, Embellishment Wand, Glue, Sparkle Glitter, Triangle Trays (Studio Katia)


Add your comment