My son had a birthday party to attend this weekend so I made up an interactive card to hold the gift card he was giving.
Showing posts with label
Interactive Cards


It's our nephew's 7th birthday this week and here is the fun gumball shaker card I put together for him!

I am so glad I got this set a couple of years ago - it has been put to good use! Our little friend is having a construction themed party this week, so I couldn't help but put together a little construction scene for his birthday card!

Good morning! I'm up on the Studio Katia Blog today sharing my Birthday Balloons Shaker Pocket Card. I started out by creating a base for my card using the Mini Slimline: Small Hearts Cover. I used some low tack tape to cover up the pierced detail around the cards so that I could maintain a clean white border. Next, I took out the Birthday Balloons Duo Stencil and inked up the first stencil with some Lost Shadow distress oxide ink using a blending brush. For the second stencil in the Birthday Balloons Duo Stencil set, I mixed some sparkle glitter with some black texture paste. Using a palette knife, I spread this mixture over the stencil. I removed the stencil to let the paste dry.
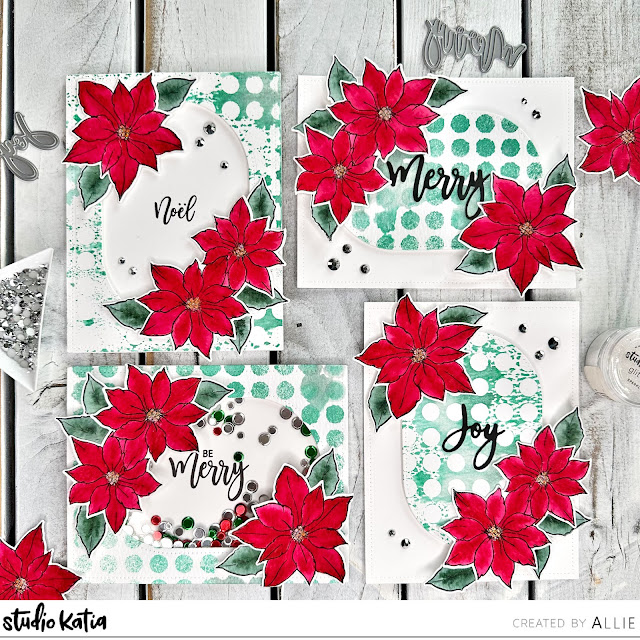
Good morning! I am up on the Studio Katia Blog this morning getting a jump start on my Christmas card stash. With all of the Christmas in July inspiration out this month, I decided to take out one of my favourite Studio Katia Christmas sets: Merry Poinsettia. I tried out the following technique so that I could make four coordinating cards all at once.

I am up on the Studio Katia Blog today featuring a new technique I wanted to try: ghost embossing! The name sounded interesting so I just had to check it out. I started out with the Dotted Slimline - Set Two large stitched rectangle and cut it out in some kraft cardstock. Next, I took out the Sunshine of Hope sunflower and started in the middle of the card. I inked up the sunflower with Vintage Photo distress ink and stamped the image twice. Then, I shifted the slimline panel over to the right and down ever so slightly. Next, I inked up the sunflower with some white pigment ink. I stamped the image 3 times. This produces the 'ghost embossing' effect by giving the illusion that the sunflower has been embossed!
*TIP* the amount you want to shift your panel to achieve this effect really depends on the thickness of the image you are using; the lines of this sunflower are not very thick, so I did not shift it very much!

Not my typical colour palette using Spiced Marmalade + Lumberjack Plaid + Prize Ribbon distress oxide inks, but when a little guy tells you those are his favourite colours, you try to make them work!

Today I am over on the Studio Katia Blog sharing a quick birthday name shaker card! My son needed some birthday cards for a birthday party for twins in his class. First, I took out the Black on White Paper Set and die cut a background using the Mini Slimline: Small Hearts Cover. Next, using the Chunky Alphabet, I die cut each of the names out of white cardstock.
*TIP* save the negative cardstock from the die cut letters to hold the letters for easy ink blending

I put together a birthday card for one of our friends this week and couldn't help but try to make it into a shaker card - I'm a bit obsessed! I took out the Beer Blueprint stamp set from Tim Holtz x Stampers Anonymous and stamped it onto Distress Watercolour cardstock. Next, I took my exacto knife and cut around the inside of the beer mug.

I am up on the Studio Katia Blog today with my first shaker card project! I am fairly new to the world of shaker cards and let me tell you, Studio Katia is the perfect spot to get all of your shaker card needs! With Mother's Day coming up soon, I wanted to make some personalized cards for both my Mom and my Mother-in-Law. What do you call your grandmother? Grandma? Nana? Nonna? Gigi? Oma? This written tutorial will detail how I made the 'Grandma' card and my YouTube video tutorial will show how I made the 'Nana' card. Supplies for both cards are listed and linked below.
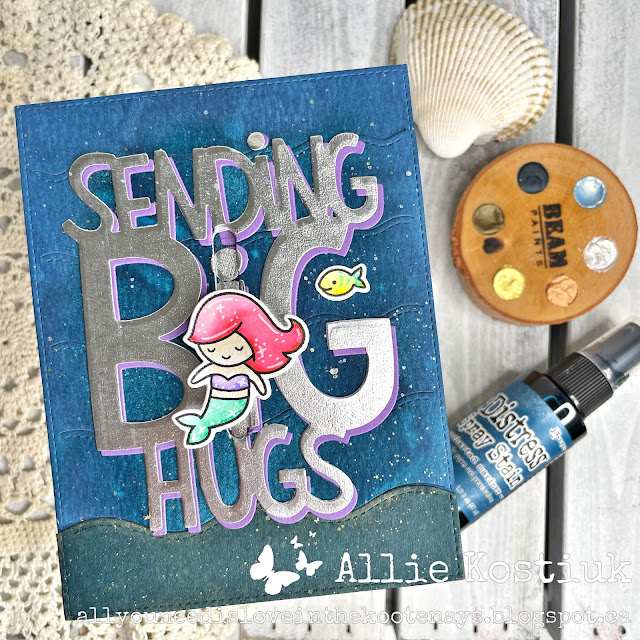
Our little friend had to do something really brave recently, so I made up this fun mermaid slider card to send along with her. I wanted to create an "under the sea" theme and started making my background with Uncharted Mariner distress spray. This was my first time experimenting with it!

Our son, Harvey, has been playing Blastball (aka T-ball) this spring and when his little friend on his team had a birthday I knew I wanted to make him a baseball themed card!
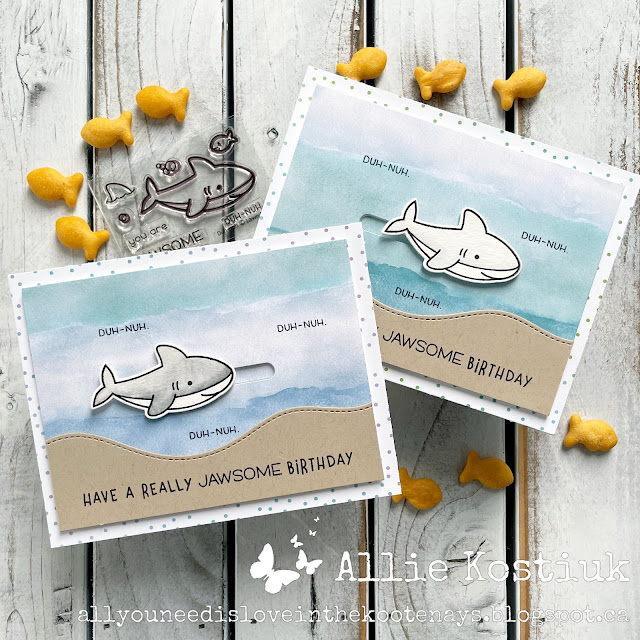
It was our friend, Hugh's 1st birthday last week, so I decided to make him a slider card from the Lawn Fawn Duh-nuh set. I stamped several sharks and tried a couple of different Tombow colours on them. I couldn't decide which one I liked better so I decided to make up two cards. As I was photographing them, my 4 year old insisted that I should include goldfish crackers in the photo :).

Here is the final flippy flappy card that I made to hold a gift card present for two of our nephews. I knew that our nephews, Charles and Jacob, were receiving a barn for Christmas, so I decided to create a farm animal themed card to go along with some wooden farm animals that we were getting them.
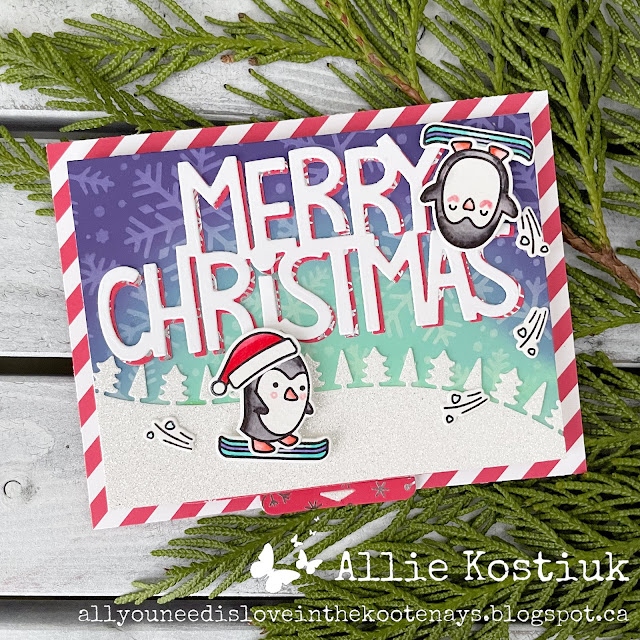
Our nephews are getting into skiing, so for their flippy flappy card this Christmas, I decided to make a skiing themed card. I combined the Lawn Fawn Penguin Party + Yeti Or Not sets to setup a scene of penguins skiing/snowboarding. I started by creating my sky using a blend of Cracked Pistachio + Faded Jeans + Villainous Potion distress oxide inks. Once it was dry, I use the Snowflake Background Stencils to stencil in some flakes in White Daisy ink.

I am SO excited to share my first flippy flappy card! I LOVE how it turned out :).

It started with being inspired on Dawn McVey's blog the other day when she mentioned trying watercolour backgrounds with your kids. I needed to make a special 4th birthday card for our friend and decided to let my 3 year old son, Harvey, help to make it! I knew that I wanted to make a reveal wheel card, so I started by cutting out the Reveal Wheel from Tim Holtz distressed watercolour paper. I cut out another blank panel that I could use to die cut some trees out of later.

I was so excited to start working on this card to celebrate our nephew's 4th birthday after taking Jenn Shurkus' Scootin' By course. I learned so many great tips for colouring and stenciling - especially with this new Lawn Fawn set! Our nephew loves to scooter and I really wanted to create an interactive card for him.

Here is another card I created with the Lawn Fawn Virtual Friends set.

After teaching online this semester, I couldn't resist getting the Lawn Fawn Virtual Friends set from The Papercrafter's Workshop this spring to make up some cards for a few of my colleagues.