
Good morning! I am up on the Studio Katia Blog today sharing my card featuring a recessed Darling Freesia. I wanted a simple design to feature this beautiful floral image and played around with my dies to achieve it. I started off with a watercolour card base and another white panel that was 4 1/4 x 5 1/2. I took that panel and used the rounded rectangle die from the Dotted Patterns - Set 3. I took out the Darling Freesia coordinating die and used it in the middle of that panel.
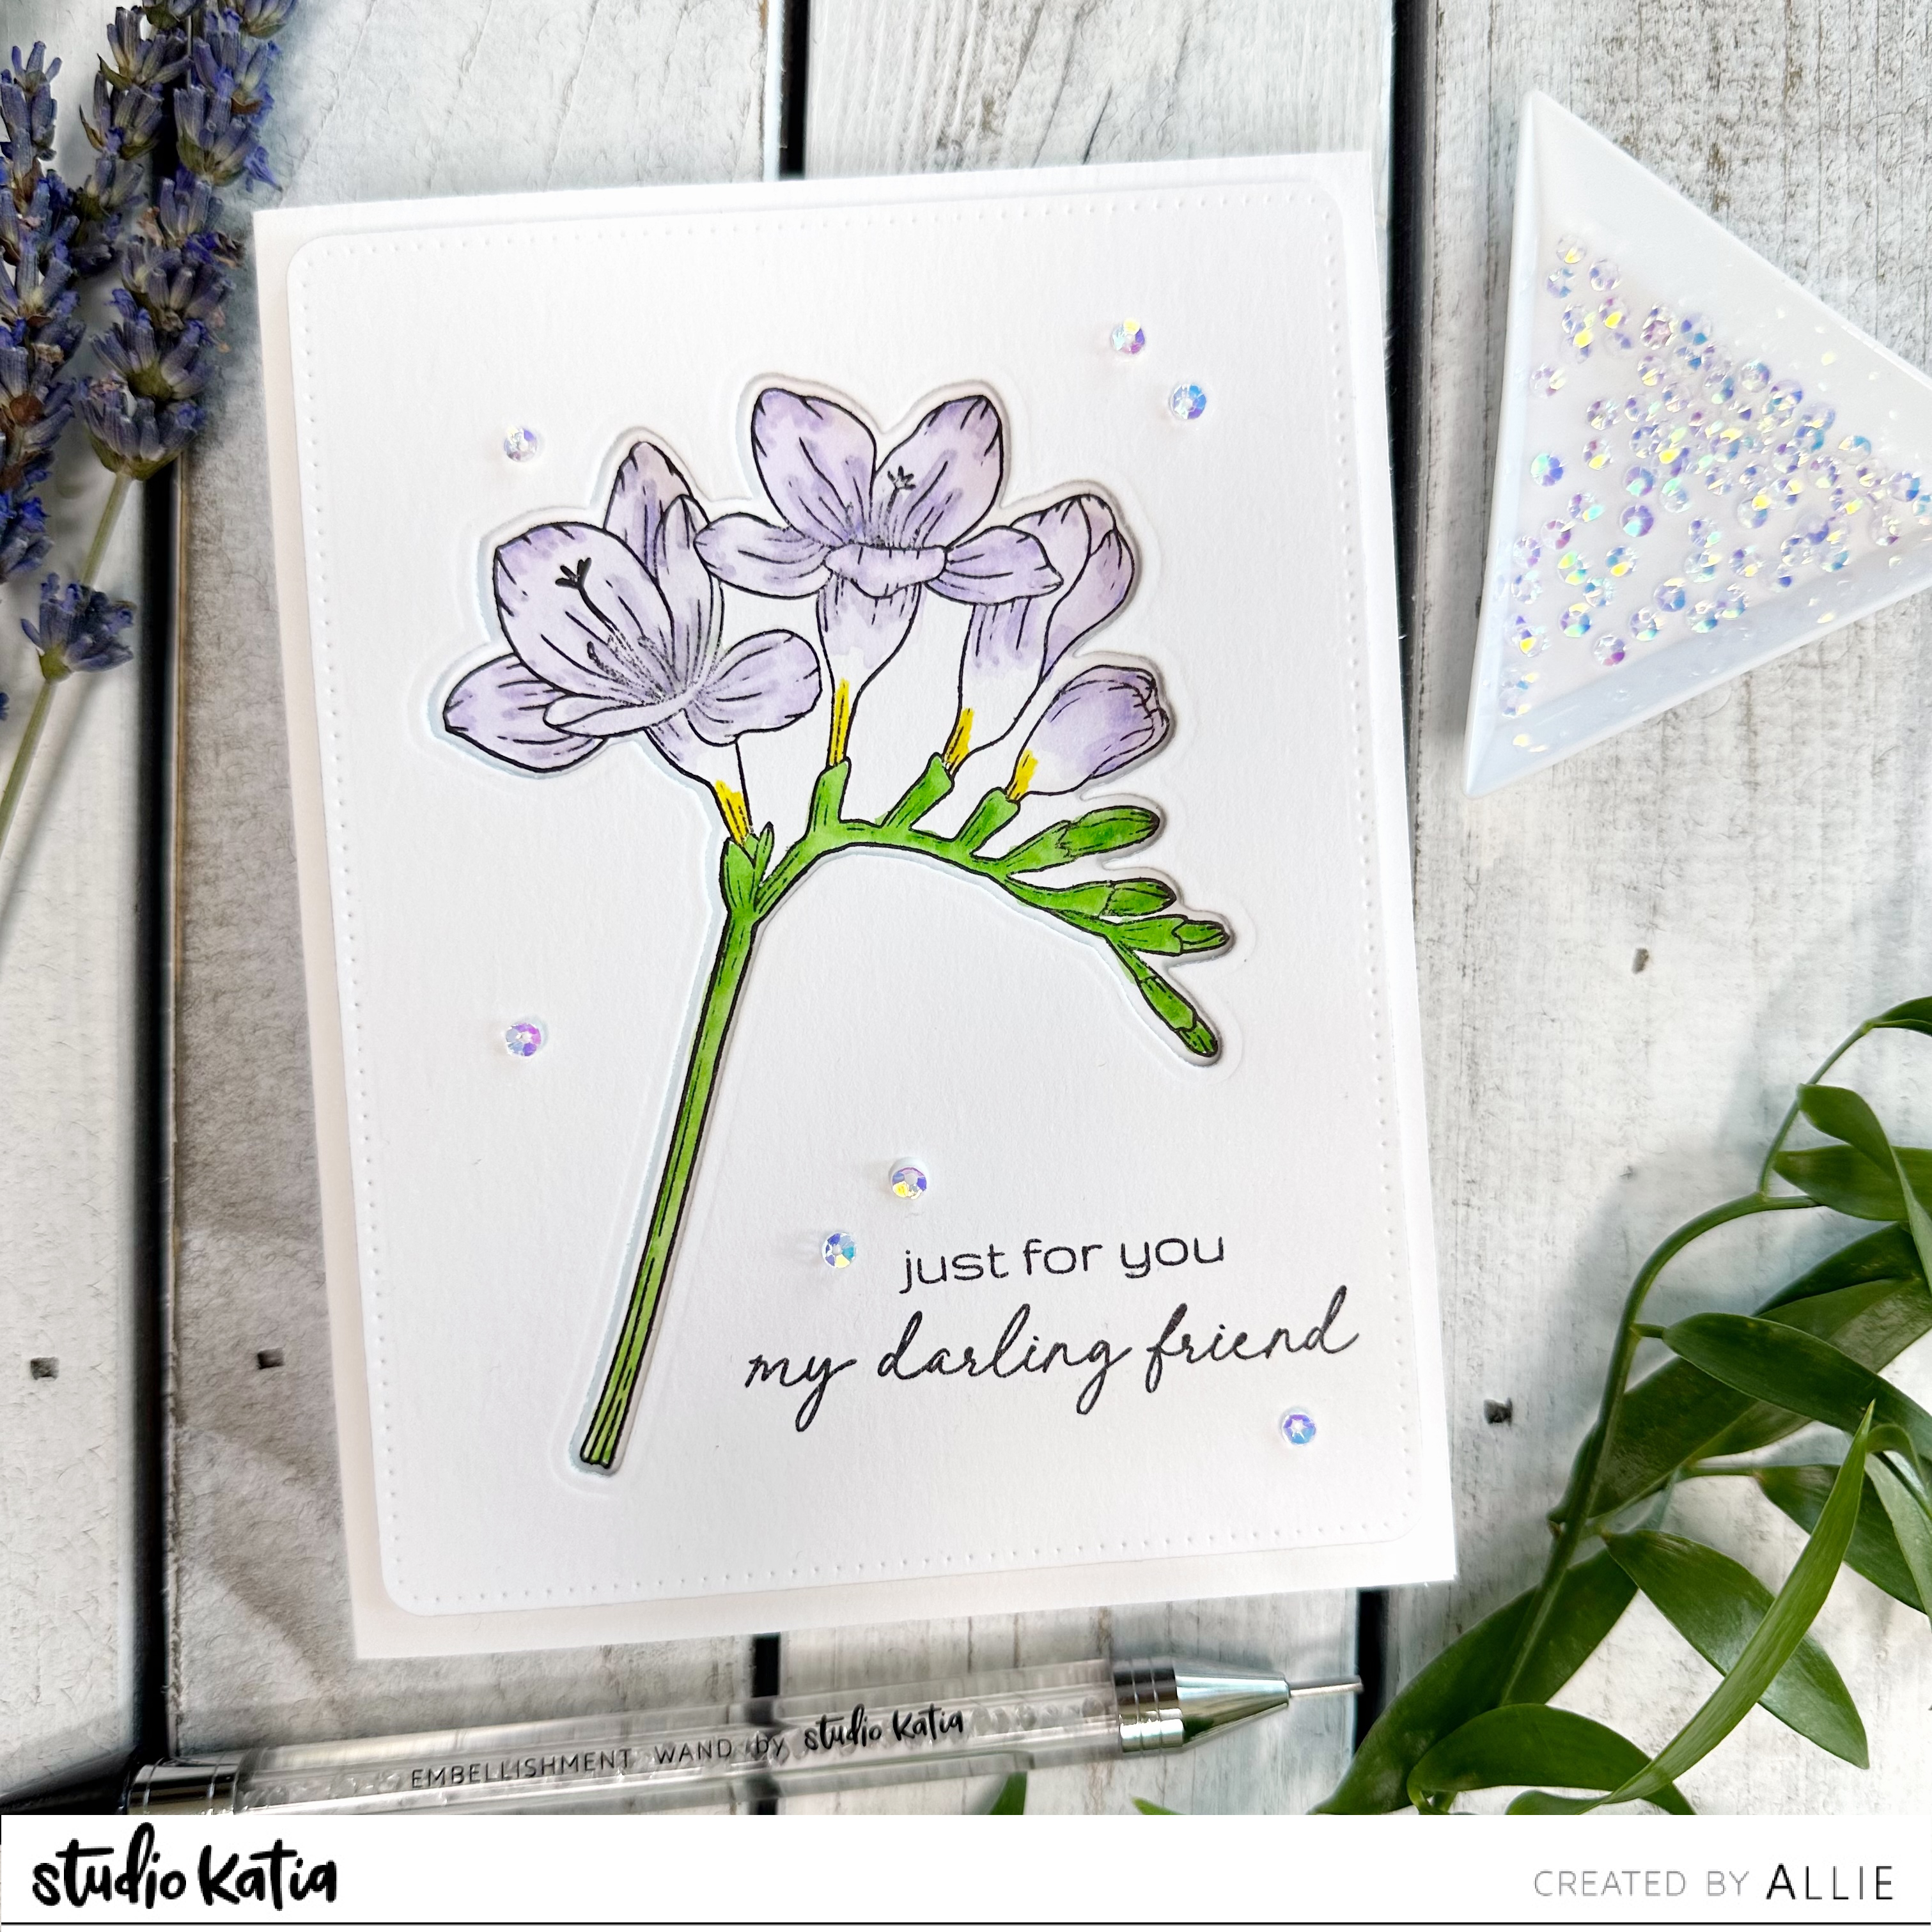
Next, I lined the panel up on the card base so that I could figure out the correct alignment to stamp the Darling Freesia flower. Using a stamping platform, I lined up the stamp and then removed the panel so that I was stamping the image onto the card base.

I chose Tombow markers 603 + 195 + 055 to colour the image. I used the Collapsible Heart Bowl as a water dish and blended out the marker using a wet paintbrush and set it aside to dry. Then, taking the die cut panel, I stamped two coordinating sentiments from the Darling Freesia set in the bottom right corner.

To assemble the card, I used double sided foam strips 1/16" on the back of the die cut panel and then adhered it to my card base while lining up the image. I took out my embellishment wand and added some 3M Crystal Clear sequins to the front of the card using liquid glue.
You can find a video tutorial on the Studio Katia YouTube channel as well as a reel on Instagram!
Thank you for joining me today and happy crafting!
Supplies:
Paper: Distress watercolour cardstock (Tim Holtz)
Stamps: Darling Freesia (Studio Katia)
Ink: Archival Black, Black (CTMH)
Dies: Darling Freesia, Dotted Patterns - Set 3 (Studio Katia)
Markers: 055, 195, 603 (Tombow)
Other: 3M Crystal Clear sequins, Bone Folder, Collapsible Heart Bowl, Crafty Tool Stand, Double Sided Foam Strips 1/16", Embellishment Wand, Liquid Glue, Triangle Tray (Studio Katia)


Add your comment